Monday, February 27, 2012

Raiding Aces Turn 3 Game 2

After the OSS tried to raid our convoy escorting our General a few days ago, command decided to seek a little payback and ordered a Raid on some OSS supplies stored outside a village and destroyed desert fort. The area is in a Wasteland and will prevent us from double timing and will make digging any foxhole more difficult... like we will need to do that. We had planned to go in with a bigger force (900 points), but the enemy will be twice as large as we are so we will go in with the bare minimum (500 vs 100 points). Strike quick...destroy the targets...and get out. The enemy reserves can come from any direction and past Raids have had them arrive right in front of our escaping just before we left the engagement area. We must prevent that from happening


Autosahariana
  • HQ CiC Warrior w/Custom Ride
  • AS42 Plt (.5 MG, 20mm AA, 40mm, HMG)
  • AS42 Plt (.5 MG, 20mm AA, 40mm, HMG)
  • 75mm Artillery 2 guns
OSS
  • CiC & 2iC
  • OSS Plt
  • Guerrilla Plt
  • Guerrilla Plt
  • Partisan Plt
  • Partisan (Warrior Ability)
  • Stuarts
  • Armored Recon


SETUP AND DEPLOYMENT

Photobucket
The engagement area


Photobucket


UNITS IN RESERVE
Autosahariana
  • None
OSS
  • All


DEPLOYMENT SUMMARY
Autosahariana: Last time all platoons pushed forward and shot at the targets. This time we realized the attacker could setup anywhere (pays to read the mission step by step) so the Command team set up in the middle of the village and would engage the center target. The guns lined up on the right edge just forward of the woods to engage a target in direct fire and provide artillery support. 1st and 2nd AS42 platoons set up on the far end of the board one on each side of the board. They would engage targets as the moved to the escape edge. The artillery observer had only one place he could really go...the Church tower.
OSS: The OSS had to keep everything in Scattered Reserves with the Armored Recon and Stuarts coming in last (in that order)


TURN 1

Photobucket


COMBAT CASUALTY SUMMARY
Autosahariana
OSS


    TURN 1 SUMMARY
    Autosahariana: The AS42 platoons had good shooting and destroyed the targets on the far edge and began moving to the center of the table. The right AS42 platoon had to survive shoots from a Partisan platoon so they drove past the objective and shot it and destroyed it as the ran by it..and out of range of the Partisans. The 75mm Battery takes out the target in front of them and then focuses fire on the Partisan platoon that appeared on the far table edge. (Mistake one here...to get points for the objective the artillery killed in direct fire I would have to get them off the table...fun with a 2in move and 4 in Avanti) 3 targets down...time to beat feet
    OSS: The Mike is able to bring a Partisan platoon on in corner 1 (Far right edge) and lay down a hail of rifle fire on the 2nd AS42 platoon. Artillery rains down and kills one stand and pins the unit. On the left table edge an OSS Platoon with LMG teams arrives and puts the village under LMG fire..right where the AS42s have to cross.


    TURN 2

    Photobucket"
    OSS Take out CiC's custom Ride!

    Photobucket
    OSS take out 1st AS42 Platoon


    COMBAT CASUALTY SUMMARY
    Autosahariana
    • 1st AS42 Plt DESTROYED
    OSS
    • 1 Partisan Stand


    TURN 2 SUMMARY
    Autosahariana: CiC comes under fire from the OSS and has to leave his custom ride behind and jump into the escort vehicle. I have to get the AS42s through the village..I move the left platoon against the walls of the buildings but that OSS platoon now has Guerrilla platoon backing him up. After the OSS LMGs destroyed the CiC's vehicle we couldn't take any chances. They move the gap between buildings and line up 4 stands...if the are destroyed the platoon will have to test. 9 shots go in...a few hits, but he OSS shrug them off. Return fire will be deadly. The Right AS42 platoon moves through the old fort and is screened from The OSS and Partisans stay pinned and cant follow up...that is until An Armored recon Platoon shows up behind the Partisans
    OSS: OSS moves its LMGs up and shoots at the CiC and his escort. The CiC is hit and his custom ride is smoking. Lucky devil manages to jump into the escort vehicle and speeds off.More support arrives with 2 Guerrilla Platoons at Corner 3 and edge 4 (Front left)...perfect position to help stop an escape. OSS get s peppered by AS42s on the left side, but in return fire destroy every vehicle.


    TURN 3

    Photobucket"
    Armored Recon take out 2nd AS42 Platoon

    Photobucket
    Partisans take out CiC

    Photobucket
    75mm Artillery kills a Armored Recon Armored Car


    COMBAT CASUALTY SUMMARY
    Autosahariana
    • 1st AS42 Plt DESTROYED
    • 2nd AS42 Plt DESTROYED
    OSS
    • 1 Partisan Stand


    TURN 3 SUMMARY
    Autosahariana: Armored Recon Platoon takes out the 2nd AS42 Platoon before they can return fire. CiC tries to make it off the table, but a Conscript Partisan Platoon surrounds him. As a parting shot the 75mm Battery shots at the Armored Recon and manages to kill an Armored car
    OSS: Armored Recon come on table at corner 1 by the Partisans (who still stay Pinned) and make a run for the remaining AS42 Platoon. They blow every vehicle up...but then the 75mm guns destroy one Armored car in return. The Partisan swarm the Italian CiC. The CiC kills 3 stands in return fire (AS42 only had 1 Vehicle MG). 6 Stands left all swing in Close combat....and MISS. CiC decides the better part of valor is to break off, but fails to get outside 4 inches and is captured
    Awesome game. Mike had a great strategy trying to stay mobile and set up some really nice kill areas that I couldn't get through. Maybe if I had just pushed through the open areas at high speed and accepted a few hits. Who knows. The mission really gave the feel of a Raid as the AS42s over ran the targets shot as they moved by and tried to escape. 3rd Raid type mission though where reserves have arrived on the the escape zone. Need to figure how to deal that.

    Smash and Grab..the final campaign scenario is this Saturday.  Looks to be a great day and will post that BatRep as well...then back to my Brit Paras  :-)


    Generated by WWPD's BatRepper Software.

    Wednesday, February 22, 2012

    Raiding Aces Round 3 Game 1

    The Mighty Autosahariana meet up with the OSS for Round 3 Raiding Aces Campaign match using Version 2 rules. Mission rolled was "Get the General" where a convoy of 5 vehicles rolls down the road and the Attacker has to take out at least 3 of them and escape off the map. This is very similar to the Raid mission where the attacker has to kill 3/5 objectives and escape off the table to win. If the platoon who killed an objective dies then those points die with them. The table was set up perfectly for this a long road with a little village in the middle...perfect for someone to hide in and ambush the convoy. The Defender gets twice as many points as the attacker in this one, so I had to proxy a few units. We roll up Mirage as the will of the Sahara and all hits over 16" have to be rerolled and as well as all Range in attempts.


    Autosahariana
    • AS42 HQ section
    • AS42 Plt (HMG, 40mm, 20mm, .5 MG)
    • AS42 Plt (HMG, 40mm, 20mm, .5 MG)
    • AS42 Plt (HMG, 40mm, 20mm, .5 MG)
    • 75mm Arty Battery
    • PAK 38 AT Gun Plat
    • Meherasti Platoon
    • Priority Interdiction Raids
    • Sporadic Air Support (Falcos)
    OSS
    • OSS Platoon
    • Guerrilla Platoon with 2 37mm AT Guns
    • Partisan Platoon
    • 2 Stuarts


    SETUP AND DEPLOYMENT

    Photobucket
    The Table


    UNITS IN RESERVE
    Autosahariana
      - Everything
    OSS
    • Stuarts


    DEPLOYMENT SUMMARY
    Autosahariana:I deploy an AS42 platoon in the Oasis just before the village and the AT Guns across the road from them. The can range in on the hills and the edge of the village
    OSS:OSS and a Guerrilla Platoon go into the village and his AT Guns stare down the road. His Partisan Platoon goes on the big hill by the AS42 platoon


    TURN 1

    Photobucket
    OSS Attacks

    Photobucket
    Falcos Attack


    COMBAT CASUALTY SUMMARY
    Autosahariana
    • 1 AS42
    OSS
    • Partisan Platoon


    TURN 1 SUMMARY
    Autosahariana:AS42s and and AT Guns hit the Partisans on the Hill and kill over half and force a Morale check. The Partisans realize they were on the wrong side the remainder run away. The Falcos come in and target the AT Guns. The pilots are being sent to see the Doctors to get their eyes checked because they THOUGHT they saw a mirage...twice!!!! Had to reroll ranging in twice and failed both times.
    OSS:OSS kill the AS42 with the .5 MG and one of the convoy vehicles.


    TURN 2


    COMBAT CASUALTY SUMMARY
    Autosahariana
    • 1 AS42
    OSS
    •  Partisan Platoon


    TURN 2 SUMMARY
    Autosahariana:Turns 2-3 failed Reserves each time. AS42s and AT Guns focus on the OSS platoon in the village. Falcos fail to arrive, but the Interdiction Raids keep his Stuarts away.
    OSS:Everyone focuses fire on the convoy as it continues down the road..taking out another vehicle. P40s fail to arrive. The 2IC who was on the hill makes a run for the AS42s below him to bring them into SMG range, but he AS42s shrug off his fire.


    TURN 3

    Photobucket


    COMBAT CASUALTY SUMMARY
    Autosahariana
    • 1 AS42
    • 1 AT Gun
    OSS
    • Partisan Platoon


      TURN 3 SUMMARY
      Autosahariana:Turns 4-5...no reserves. The 20mm AS42 moves out of the woods to move behind the hill and cutoff the OSS escape route (the long edge to the right). The rest of the force picks off one or two units from the OSS and Guerrilla platoon. Doing enough hits to pin them, but they unpin next turn
      OSS:Everyone focuses on the convoy and they kill the third vehicle. Time to bug out. P40s come in and kill one of the AT Guns as they were moving out of the woods. Interdiction Raids continue to keep the Stuarts away.
      Turn 6 closed it down. The OSS and Guerrilla platoons broke from cover and started to move towards the escape table edge. In my turn I get 1 platoon from reserve...had to take an AS42 platoon...and I roll a 2 for location. Wouldnt you know it... That was the long table edge the OSS had to cross to escape. The AS42s move up on the reverse slope of the long hill and gun down the Guerrillas and the first AS42 platoon breaks cover and almost wipes out the OSS platoon, but they pass their morale check. The Guerrillas had killed one convoy vehicle and now that point was lost. This forced the OSS to have to kill another vehicle....but they were almost off the table edge and if he did go after them he never would have made it off the table to escape. We called it that point. Great game and a great opponent. It really felt like an ambush from start to finish. If I didn't get that last AS42 platoon when and WHERE I did it would have been a different story.


      Generated by WWPD's BatRepper Software.

      Friday, February 17, 2012

      Basing

      When I started (Late 80s-90s)miniature gaming I used a VERY simple basing style. I just glued some Woodland Scenics green flock to the base.

      DBA Norman CiC
      That never sat well with me and then I started experimenting with rocks and paint. I would leave some sections just painted and flock others…I would also use rocks and pieces of straw.

      BloodBowl Dwarf Trollslayer
      A little later (2004ish) I discovered static grass and Battlefront and used this method till just now. Here I would texture the base with spackle…paint the base brown…add static grass…blow on it to stand it up…then add a few Silfor tufts here and there. I would leave little sections of the base unpainted to show the “dirt”. Before I discovered Silfor I tried to make my own tufts...ok for 28mm but not for 15mm

      Dismounted Polish Kawalerii Troop Command

      I saw pictures recently of WWPD’s Dirty Jon’s German AT guns and started asking him how he did his bases. He was kind enough to email me and share his secrets. Just recently he posted a great tutorial on the  WWPD Basing Tutorial . I also saw some of Max's from the WWPD crew and some tips and videos he posted on YouTube. This led me to the technique I am using now.
      I am now make 3 layers and then hi lighting with clump foliage and Silfor tufts.  I cover the base with either spackle or Vallejo Pumice.  Paint it Chocolate Brown, black wash it then hi light with Earth Brown and US Field Drab.  Now for the layers... The first layer is a "Soil" layer.  It is made from a mix of Woodland Scenics FineTurf Soil and Earth as a base with some Fine Turf Burnt Grass added in for flavor.


       I let that dry a little.  Then I use watered down Elmer's (PVA) glue and then add a "Turf" layer.  I don't cover all the soil layer.  I want little patches of the dirt to pop through.  The Turf Layer consists of Woodland Scenics a little more Fine Turf Earth and a heavy base of Fine Turf Green Grass and a little Fine Turf Weeds.  A also threw in a little Galeforce 9 Winter Dead Static Grass, Summer Flock and Meadow Flock.  A pinch of Woodland Scenics Dark Green Static Grass was also added.

      I let that dry for a little bit and then add some more watered down Elmer's Glue in smaller patches than before and add the third or "Grass" layer.  This layer is mostly Woodland Scenics Dark and Light Green Static Grass with a pinch of the Galeforce 9 Winter Dead Static Grass.

      Lastly I add the clump foliage and Silfor Tufts.  Sure it takes a little longer, but the results are worth it.  The different layers add a 3D effect to the bases which adds more life to the unit.
      Now, compare to the static grass method I was using....

      Old Way

      New Way

      And


      New way takes a little more time, but is a big improvement.  Multitasking helps alot....like do the glue as you end a session so it dries and when you have your next session you can move to the next step.  Paint other models in the queue while things dry, etc...

      Saturday, February 11, 2012

      Round 2 in our Raiding Aces Campaign at my FLGS (The Foundry). Took my Autosahariana against the store Owner's (Adrien's) LRDG. We rolled off and I got to be the Attacker and we fought over Hon that already had one Allied victory. We had to even the score. The High Command decided to send us out on a Raid this time where there were 5 objectives and I had to destroy at least 3 of them and get those platoons off the table for it to be a success We set out with a larger force than last time (700 pts), but it is rumored the LRDG would have a force about twice our size. Lucky for us they were all over the place and not in the objective area when we planned to attack....just some sentries that would keep us from getting too close. Usually we would do something like this at night, but we have some air power supporting us this time and I want to get in and out as quickly as possible...so we will attack in broad daylight. So we set out and it wasnt long before we felt the Will of the Sahara and our follow-on platoons began to get seperated and hopefully not not too lost. am glad I had the mechanics customize my AS42 with a captured twin vickers in addition to my other 2 vehicle machineguns...we might just need that firepower now.


      Autosahariana
      • Warrior CiC with Custom Ride AS42 (Twin Vickers and 2 AAMG), 1 AS42 with 2 AA MG
      • 3 AS42 Plts (1 w/47mm & AA MG, 1 w/20mm & AA MG. 1 with .50, 1 w/AA MG)
      • 1 75mm Artillery Battery with 2 75mm pieces, staff team and observer
      • Sporadic Air Support (FIAT Falco)
      LRDG
      • 3 LRDG Truck Platoons
      • 1 SAS Platoon
      • 1 plt 2 Honey Stuarts
      • Priority Indicition Raids
      • All had to be proxied (Adrien's troops had gone into hiding. Its a shame cause they are painted very well and it would have made for some fantastic photos)


      SETUP AND DEPLOYMENT

      Photobucket" width="50%" />
      The objective area


      UNITS IN RESERVE
      Autosahariana
      • 2nd & 3rd AS42 Platoon
      • 75mm Artillery
      LRDG
      • EVERYTHING


      DEPLOYMENT SUMMARY
      Autosahariana:Not only are the follow-on platoons lost, they are getting hit by interdiction raids and are slowed down even more. Even though we should start with everyone in the mission area, we will only start with the Command Element and 1st Platoon. We WILL need that extra firepower now. We get into the target area and the sentries run away like cowards. The first 3 objectives are in a line running perpendicular to us roughly halfway into the engagement area. I am glad I brought the artillery observer with us. He heads up into the top of the tower to be in position to cover our retreat once we blow the objectives and the artillery shows up...if and when it does.
      LRDG:LRDG starts with all units in Scattered Reserve. With the Will of the Sahara being "Lost" all reserves come in on a roll of 6 instead of the usual 5+ 5 objectives we used were red poker chips (long story). I placed three as close as I could to the center of the board (8" from the sides and the center of the board and 10" from each other). Adrien place 2 as far to the back as he could (8" from table edge and 10" from another objective).


      TURN 1


      COMBAT CASUALTY SUMMARY
      Autosahariana
      • None
      LRDG
      • None


      TURN 1 SUMMARY
      Autosahariana:1st platoon heads for the center objective and I head with the command element to the one on the far left. The plan is to use our overwhelming firepower and speed to finish this mission. We will shoot at the objectives to destroy them. We will dismount and use our satchel charges only in an emergency. The 20mm and 47mm should make short work of the targets. 1st platoon is able to start firing almost immediately. They score numerous hits, but hit nothing vital. AS we start to shoot, second platoon arrives. No sign of the enemy...but it wont be long. We have to be quick about this. 1st platoon destroys the center objective and then joins be on the left objective as 2nd platoon moves tot eh right objective and destroys on its first attempt. Soon after the right objective falls just as the LRDG arrive. No sooner than the enemy arrive does 3rd platoon arrive as well as 2 FIAT Falcos. No its a race to escape. 3rd Platoon will cover the retreat of 1st and 2nd platoon. The Falcos and artillery (when it arrives) will harass any pursuers. The Falcos dive in but the withering AA fire of the British was devastating and both aircraft go down in flames.
      LRDG:The LRDG must be Lost still as no reserves arrive until turn 3. Finally one platoon arrives and races to the center of the board and runs into the Italian 3rd platoon and kills one AS42.


      TURN 2

      Photobucket" width="100%" />
      LRDG Arrive just in time to stop 1st Platoon's escape

      Photobucket" width="100%" />
      LRDG arrive again just in time to stop 2nd Platoon's escape

      Photobucket" width="100%" />
      The aftermath


      COMBAT CASUALTY SUMMARY
      Autosahariana
      • None
      LRDG
      • None


      TURN 2 SUMMARY
      Autosahariana:It was all a blur after that. 1st and 2nd platoons were making there escape as fast as they could using the roads and pushing their vehicles hard...shouts of Avanti! could be heard as the drivers moved a little faster than normal. Just before 1st Platoon could escape into the desert, a LRDG Truck platoon cut them off. The fire was withering and 2 vehicles went up quickly, but our return fire was equally devastating...but not enough to cause the enemy to run and we were overwhelmed. 2nd platoon suffered a similar fate as a dismounted SAS platoon with SMGs cut them off supported by 2 Honey Stuarts. They had no time to react. 3rd platoon tried to make tried to withdraw, but was cut down as well by the much reduced 1st LRDG platoon. To make matters worse a 3rd LRDG platoon had entered the fray by the left objective and was moving in fast. The artillery fired like mad, but only succeeded in slowing down the advance. There was no way to salvage the mission now so the artillery and I disappeared into the desert.
      LRDG:Scattered reserves came in at the right place and time. Both 1st and 2nd AS42 platoons were cut off just before the could have escaped off the board.
      Awesome game and nail biter right to the end. Having both of platoons cutoff when on my next movement phase they would have escaped was crushing. Adrien had a hard first couple of turns, but that hurt me as well now that I think about. If he had gotten his reserves earlier I could have manuevered and a little. As it was the arrived right where they needed to cut me off right when I was the most exposed. Oh well. I did earn enough campaign experience to get the next ability...."Heavy Firepower" where one vehicles in each Combat platoon gets a HMG. This gives the mounted MG a ROF 6 when stationary and 3 when moving and the team can dismount as a HMG team. Very nice.


      Generated by WWPD's BatRepper Software.

      Tuesday, February 7, 2012

      Italian 75mm Artillery Battery

      Fire support for my Autosahariana..  Nice guns...and they can smoke too!

      The Battery


      Command Team and Observer


      Staff Team


      1st Section


      2nd Section


      The basing was pretty straight forward and in person gives a real good dusty effect.  I pumiced the bases with Vallejo Grey Pumice.  I then added some Galeforce 9 sand and small rocks.  A basecoat of an Arts & Craft Chocolate Brown paint followed with a black wash.  Then a heavy hi-light with Vallejo Khaki and a lighter hi-light of Vallejo Dark Sand.  Sprinkle in some Galeforce 9 Arid Grass...Viola!

      Wednesday, February 1, 2012

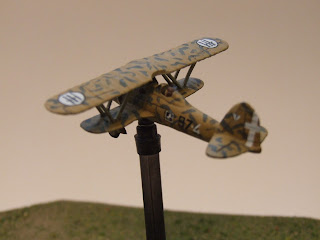
      Fiat Falco

      Air support for my Autosahariana. Have only painted one so far…and with Version 3 rumored to only need 1 vice 3, it might be the only one I do. Building it was pretty straight forward. Put the struts on the lower wing and wheels on the fuselage. Leave the wing off while you paint. Painted the lot and glued the top wing on once painting was done. Decals were pretty easy too….except for the white cross on the plane’s rudder. You have to trim the cross piece a little on both ends as well as the long pieces in order to make it fit.

      And now the pictures!


      All the camo was handpainted...still trying to work the kinks out with the new airbrush and I haven't mastered doing something that tight with the airbrush yet.  Still playing with paint/water ratios, air pressure and nozzle sizes.  Once I get that down I will do up one of the other Falcos I have and do it "right."

      And we just entered Turn 2 of our Raiding Aces Campaign...and the Allies need to be looking to the skies because this baby is coming in hot.